Hey there! As a supplier of small concrete pumps, I've seen firsthand how these machines can revolutionize construction projects, big or small. Today, I'm gonna walk you through the process of installing a small concrete pump. It might seem a bit daunting at first, but with the right steps and a bit of know - how, you'll have your pump up and running in no time.
Step 1: Preparation
Before you even think about getting the pump out of the box, you need to do some prep work. First off, find a suitable location. The area should be flat, stable, and able to support the weight of the pump and the concrete it'll be handling. A soft or uneven surface can cause the pump to tip over or malfunction, and that's the last thing you want.
You'll also need to make sure there's enough space around the pump for easy access. You'll be moving parts, connecting hoses, and doing some maintenance, so having room to maneuver is crucial.
Next, gather all the necessary tools. You'll typically need wrenches, screwdrivers, and maybe a torque wrench to ensure all the bolts are tightened to the right specifications. It's a good idea to have a toolbox handy so you can keep everything organized.
Step 2: Unloading and Inspection
Once you've got your location and tools ready, it's time to unload the pump. Be careful when doing this, as small concrete pumps can be heavy. Use a forklift or a hoist if possible to avoid any injuries.
After unloading, give the pump a thorough inspection. Check for any visible damage during transit, like dents, scratches, or loose parts. If you find anything, contact us right away. We're here to make sure you get a high - quality product, and we'll work with you to resolve any issues.
Step 3: Positioning the Pump
Now that the pump is unloaded and inspected, it's time to position it in the right spot. Use a level to make sure the pump is perfectly horizontal. This is important for the proper functioning of the pump, as an uneven pump can cause problems with the flow of concrete.
Once it's level, secure the pump to the ground. Some small concrete pumps come with mounting brackets that you can bolt to the floor. Make sure all the bolts are tightened properly to prevent the pump from moving during operation.
Step 4: Connecting the Hoses
One of the most important steps in installing a small concrete pump is connecting the hoses. You'll have a suction hose and a delivery hose. The suction hose is used to draw the concrete from the hopper, while the delivery hose is used to transport the concrete to the desired location.
Start by connecting the suction hose to the pump inlet. Make sure the connection is tight and secure. You can use clamps or couplings to ensure a leak - free connection. Then, connect the delivery hose to the pump outlet. Again, check for any leaks and tighten the connections as needed.

It's also a good idea to support the hoses properly. You can use hose hangers or brackets to keep the hoses in place and prevent them from kinking or getting damaged.
Step 5: Electrical and Hydraulic Connections
If your small concrete pump is electrically powered, you'll need to connect it to a power source. Make sure the power supply meets the pump's requirements in terms of voltage and amperage. Use a proper electrical cable and follow all the safety guidelines when making the connection.
For hydraulic - powered pumps, you'll need to connect the hydraulic hoses. These hoses are used to transfer the hydraulic fluid that powers the pump's components. Just like with the concrete hoses, make sure the connections are tight and there are no leaks.
Step 6: Testing the Pump
Once all the connections are made, it's time to test the pump. Before you start, make sure there's no debris in the hopper or the hoses. Fill the hopper with a small amount of water and start the pump. Let the water circulate through the system to check for any leaks or blockages.
If everything seems to be working fine, you can start adding a small amount of concrete to the hopper. Monitor the pump's operation closely. Check the pressure gauges to make sure the pressure is within the recommended range. If you notice any abnormal noises, vibrations, or pressure fluctuations, stop the pump immediately and check for problems.
Step 7: Final Checks and Adjustments
After testing the pump, do a final check of all the connections and components. Make sure all the bolts are still tight, and there are no signs of wear or damage. You may also need to make some adjustments to the pump's settings, like the flow rate or the pressure, depending on your specific project requirements.
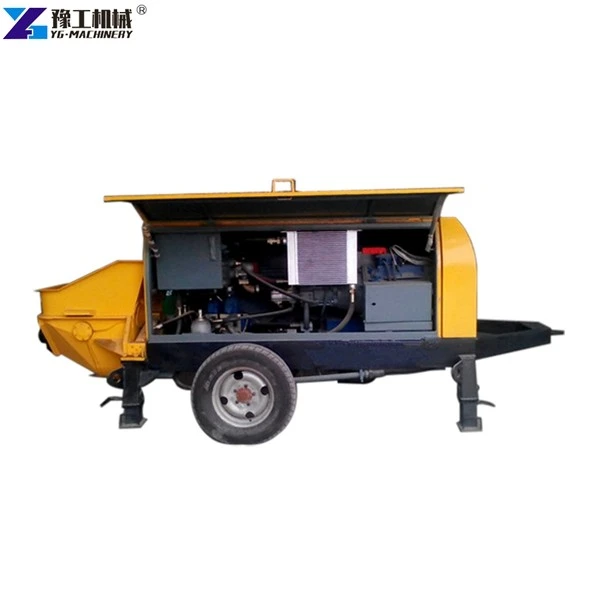
Now, you might be wondering about other related equipment. We also offer a range of products like the Concrete Mixer Pump, which combines the functions of a mixer and a pump, and the Concrete Pump Trailer, which is highly portable and easy to move around the job site. And if you're looking for something more compact, our Portable Shotcrete Machine is a great option.
If you're interested in purchasing a small concrete pump or any of our other products, we'd love to hear from you. Whether you're a contractor working on a small - scale building project or a DIY enthusiast taking on a home improvement task, our small concrete pumps can make your job a whole lot easier. Contact us to start a conversation about your specific needs, and we'll work with you to find the best solution for your project.
References
- Construction Equipment Handbook: A guide to various construction equipment installation and operation.
- Small Concrete Pump Manufacturer's Manual: The official manual provided with the small concrete pump, which contains detailed installation and maintenance instructions.


